 Skip to main content


Your first n8n workflow does a real job: a website contact form that saves every message into a table inside n8n. It takes two nodes and no code, and you test it at every step before it goes live.
In this part you build your first n8n workflow from a blank canvas. Along the way you learn the editor’s main pieces: triggers and nodes, test runs, the INPUT and OUTPUT panels, mapping data by dragging it, publishing, and the list of past runs. By the end, a published form saves each message as a new row in a data table.
This is Part 2 of the n8n Tutorial. The parts in Module A, Start Here:
- Part 1: What Is n8n? Workflow Automation Explained
- Part 2: Build Your First n8n Workflow (you are here)
All parts of the n8n Tutorial
Module A: Start Here
Module B: Workflow Basics
- Part 3: Run a Workflow on a Schedule
- Part 4: Webhooks: Start a Workflow from Any App
- Part 5: Forms: Collect Data with n8n Forms
- Part 6: Credentials: Connect n8n to Your Apps
- Part 7: Executions, Debugging and Pinned Data
- Part 8: Organise Your Workflows
Module C: Working with Data
- Part 9: Items and JSON: How Data Moves in n8n
- Part 10: Expressions: Use Data from Earlier Nodes
- Part 11: Transform Data
- Part 12: Filter and Compare Data
- Part 13: Dates and Times
- Part 14: Files: CSV, Excel and PDF
- Part 15: Data Tables: Store Data Inside n8n
Module D: Flow Logic
- Part 16: If and Switch: Make Decisions
- Part 17: Merge: Combine Branches
- Part 18: Loops and Batches
- Part 19: Wait and Human Approval
- Part 20: Sub-workflows
- Part 21: Error Handling
Module E: Code and APIs
- Part 22: HTTP Request: Call Any API
- Part 23: The Code Node in JavaScript
- Part 24: The Code Node in Python
Module F: AI with Claude
- Part 25: Your First AI Agent
- Part 26: Give Your Agent Tools
- Part 27: Memory That Lasts
- Part 28: Answer from Your Documents
- Part 29: AI Chains: Summarize, Classify and Extract
- Part 30: Human in the Loop and Guardrails
- Part 31: MCP in n8n
- Part 32: Evaluations: Test Your AI Workflows
- Part 33: Free Local AI with the Self-Hosted AI Starter Kit
- Part 34: An n8n Agent in Microsoft Teams
Module G: Connect Apps and Extend n8n
- Part 35: Connect Popular Apps with OAuth2
- Part 36: Community Nodes
- Part 37: Build Your Own Node
- Part 38: Programmatic Nodes and Publishing
- Part 39: The n8n API and CLI
- Part 40: Build Workflows in Code with the Workflow SDK
Module H: Self-Hosting for Production
- Part 41: Configure n8n with Environment Variables
- Part 42: Run n8n on PostgreSQL
- Part 43: Queue Mode and Workers
- Part 44: Task Runners and Security
- Part 45: Back Up, Restore and Update n8n
- Part 46: Logs, Metrics and Tracing
- Part 47: Put n8n Online with HTTPS
Module I: Users and Administration
- Part 48: Users, Roles and Two-Factor Authentication
Module J: n8n Cloud
- Part 49: Start an n8n Cloud Free Trial
- Part 50: AI Workflow Builder, Assistant and Gateway Credits
Module K: Wrap-up
- Part 51: Final Project, Cheat Sheet and What to Learn Next
Cost: free. Everything here runs on your own n8n Community Edition.
Every screen and output on this page is real, run with n8n 2 in Docker on macOS.
What You’ll Build
A Contact us form with three fields, Name, Email and Message, and a workflow that saves each message in a data table named Contact messages. The messages in this part come from fictional customers of a small bookshop. You start from n8n running on your computer, on a blank Overview page.
Prerequisites
- Part 1: What Is n8n?, for the words this part uses: workflow, trigger, node and item.
- n8n running, signed in as its owner.
Step 1: Create a Data Table
A data table (opens in a new tab) stores rows of data inside n8n itself, so you don’t need a separate database. Make the table first; the workflow fills it later.
Open n8n (the install guide runs it at http://localhost:5678). Click + at the top of the left menu, then New data table.

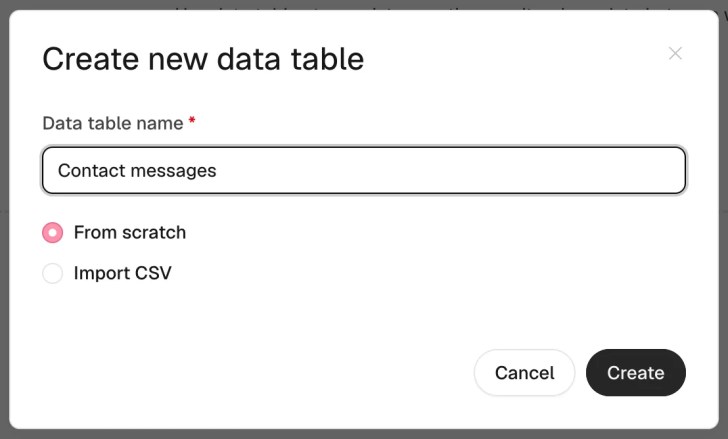
Name it Contact messages, keep From scratch selected and click Create.
The new table already has three columns n8n fills for you: id, createdAt and updatedAt. Add one column for each form field: click Add Column, type name, keep the type string (text) and click Add Column in the box.

Add two more string columns the same way, email and message. The table now has the columns the form will fill.

Step 2: Create a Workflow
Click + at the top of the left menu again, then New workflow. n8n opens an empty canvas named My workflow, with a box that says Add first step…. Note the Publish button at the top right; you’ll use it in Step 9.

Click My workflow, type Contact form to data table and press Enter. There’s no Save button: n8n saves your changes automatically (opens in a new tab) as you edit.
Step 3: Add the Form Trigger
Every workflow starts with a trigger: in n8n’s words, “a step that starts your workflow”. Click the + box. In What triggers this workflow?, click On form submission. This is the n8n Form Trigger (opens in a new tab): it builds a web form for you and starts the workflow each time someone submits it.

The node’s settings open. Type Contact us in Form Title and Send us a message. We reply by email. in Form Description. The two addresses under Form URLs come into play in Steps 4 and 10.

Now add the three fields. For each one, click Add Form Element, type the Label, choose the Element Type, then click Add Attributes › Required Field and turn the switch on:
- Name, type Text Input.
- Email, type Email, so the form only accepts an email address.
- Message, type Textarea, a larger box for longer text.

Advertisement
Step 4: Test the Form
Click Execute step at the top of the node’s settings. It runs just this node: n8n opens the test version of your form in a new tab and waits for a submission. Fill it in and click Submit; this part used a fictional customer, Maya Fernandes.

The form thanks you with Form Submitted.

Go back to the n8n tab. The OUTPUT panel on the right now shows what the trigger produced: 1 item, n8n’s name for one record of data. It holds your three fields plus two that n8n adds: submittedAt, when the form was sent, and formMode, which says test for a test submission.

Note: submittedAt shows n8n’s default time zone (here -05:00) until you set your own. Part 3 covers time zones.
Close the node’s settings with the × at the top right.
Step 5: Add the Data Table Node
An action node does something with the data a trigger passes on. On the canvas, click the + at the right of the trigger. In What happens next?, type data table and click Data table.

The node lists everything it can do. Under Row actions, click Insert row.

The node’s settings open with a new panel on the left: INPUT, the data arriving from the previous node, here Maya’s form entry. In the middle, under Data table, choose Contact messages from the list. Keep Mapping Column Mode at Map Each Column Manually: n8n shows a box for each of your columns under Values to insert.

Step 6: Map the Form Fields to the Columns
Mapping tells n8n which piece of incoming data goes into which column. Drag Name from the INPUT panel and drop it on the name box. Do the same with Email onto email and Message onto message.
Each box now holds an expression, and n8n previews its value underneath. The name box reads:
{{ $json.Name }}
It means “the Name field of the item coming in”, so each new form entry fills the column with its own name. Part 10 covers expressions in depth.

Step 7: Test the Insert
Click Execute step. The node inserts Maya’s entry, and its OUTPUT shows the new row: your three columns plus id 1 and the time it was created.

Watch out: testing a step really runs it. This test added a real row to Contact messages; in a workflow that sends emails, a test sends a real email.
Step 8: Run the Whole Workflow
Close the node’s settings. Click Execute workflow on the canvas: this time n8n runs every node in order. The test form opens again; submit a second message (here from Ravi Menon). Back in n8n, both nodes show a green tick and 1 item passed between them.

Step 9: Publish the Workflow
So far the form only works while you test it. Publishing makes the workflow live: the form gets a permanent address and runs the workflow on its own. Click Publish at the top right. n8n suggests a Version name; add a short note under Describe changes if you like, then click Publish.

n8n confirms Workflow published, and the button at the top right now reads Published. Click Got it.

Step 10: Use the Live Form
Double-click the form trigger to open it, and under Form URLs click Production URL. This is the form’s permanent address, the one you’d share. It looks like the test address without -test.

Copy the address, open a new browser tab, paste it and press Enter. The live form has no “test version” banner. Submit a third message (here from Leela Iyer).

Step 11: Check the Executions and the Table
Every run of a workflow is an execution. Back in the workflow, click the Executions tab at the top. The live form’s run is at the top of the list, marked Succeeded with the version you published; your test runs below it carry a small flask icon.

Now open the table: click Overview in the left menu, then the Data tables tab, then Contact messages. All three messages are there, one row each.

Clean Up
Nothing here costs anything, so you can keep the workflow. To remove it:
- In the workflow, click the arrow next to Published, choose Unpublish, then Unpublish again to confirm. The live form stops working.
- Click … next to the workflow’s name and choose Archive. n8n archives it at once and hides it from the list.
- To delete it for good, click Update filters in the message Archived workflows are hidden in this view to show it, open the archived workflow’s … menu, choose Delete and confirm with Yes, delete.
- In Data tables, open the … menu of Contact messages, choose Delete and confirm. This deletes its rows too, with no undo.


Common Mistakes
| Mistake | What happens | Do this instead |
|---|---|---|
| Sharing the Test URL | It only works while n8n is waiting for a test run | Publish, then share the Production URL |
| Editing a published workflow and expecting the live form to change | The live form keeps running the version you published | Publish again after your changes |
| Thinking test runs are a sandbox | Tests run for real: each one added a row here | Test with sample data you can delete |
| Typing a value into a column box instead of dragging the field | Every row gets that same fixed text | Drag the field from INPUT so the box holds an expression |
Troubleshooting
| Problem | Cause | Fix |
|---|---|---|
| Contact messages isn’t in the Data table list | The table wasn’t created, or has another name | Create it as in Step 1, then pick it again |
| The INPUT panel is empty in Insert row | The trigger hasn’t run yet in this session | Run the trigger with Execute step (Step 4) first |
| The live form doesn’t start the workflow | The workflow isn’t published | Check that the top-right button says Published |
FAQ
What’s the difference between Execute step and Execute workflow?
Execute step runs one node, which is handy while you set it up. Execute workflow runs the whole workflow from its trigger. Both are test runs and show their data in the editor.
Where does a data table store its rows?
Inside n8n’s own database. n8n’s docs (opens in a new tab) describe data tables as suited to light or moderate data, with 200 MiB for all tables together by default; a self-hosted n8n can raise that limit.
Can visitors to my website use this form?
Only if they can reach your n8n. An n8n on your own computer serves the form at a localhost address, which works only on that computer. A later part of this series puts n8n online with HTTPS.
Do I have to publish to keep my work?
No. Your workflow is saved as you edit. Publishing only decides whether its trigger runs on its own.
Conclusion
You built a complete n8n workflow: a form trigger that starts it, a data table node that stores each message, and a published version that runs on its own. You also used the moves every workflow needs: testing one step, reading INPUT and OUTPUT, mapping fields by dragging, and checking executions.
← Part 1: What Is n8n? Workflow Automation Explained
Coming next: Part 3: Run a Workflow on a Schedule.
Additional Resources
- n8n Form Trigger node (opens in a new tab) (n8n docs)
- Data Table node (opens in a new tab) and Data tables (opens in a new tab) (n8n docs)
- Save and publish workflows (opens in a new tab) (n8n docs)
- Keyboard shortcuts (opens in a new tab) (n8n docs)
n8n and other names mentioned are trademarks of their respective owners. JD Bots isn’t affiliated with or endorsed by n8n GmbH.


0 comments