
The Azure Bot resource allows you to register your bot with the Azure Bot Service. You can build, connect, and manage bots to interact with your users wherever they are, from your app or website to Teams, Messenger, and many other channels.
Please Note:
Web App Bot and Bot Channels Registration will be deprecated but existing resources will continue to work. You should use Azure Bot, instead.
In this post, we will create the Azure Bot resource in Azure Portal.
Prerequisites
Create the Resource
Log in to Azure Portal. Click on Create a Resource.

In the search box, search for Azure Bot and click on it.

Click on Create.

Fill up the Azure Bot Form with the required values and click on Review + Create.

- Bot handle –
MyFirstBot_v101(Give any name of your choice). - Subscription – Choose your valid subscription.
- Resource Group – Create new or Select from existing. I will choose an existing resource group “
BotRG”. - Pricing Tier – F0 (I will select the free tier for the demo. For higher requirements go for S1 tier. Remember S1 tier will incur charges).
- Microsoft App ID –
Create new Microsoft App ID
Once the validation is passed, click on Create.

Wait for few seconds for the deployment to complete.
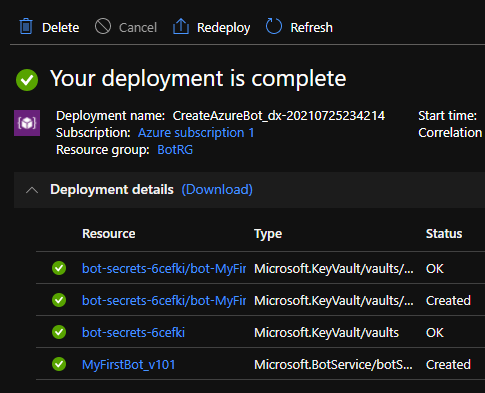
Go to the resource group and find the 2 resources that got created. One is of type Key vault and another one is the Azure Bot.

The app secret (password) is stored in the key vault and there is one key vault per resource group. Open the Azure Bot resource.

You can either start building the bot using the Bot Framework Composer or download it from GitHub to start building with Bot Framework SDK.
Find the Azure Bot resource app Id by going through this post here. Learn building amazing chatbots using Bot Framework SDK here.
